- Color & Coating
- Environmental Testing Systems
- Temperature Humidity Chamber
- Ozone , Dust , Rain & Noxious Gas Chamber
- Accelerated Weathering Test Chamber
- Salt Spray Test Chamber
- Drying Oven
- Digital Thermometer
- Digital Temperature & Humidity Meter
- Infrared Thermometer
- Moisture Meter
- Anemometer
- Light Meter
- Sound Level Meter
- Particle Counter
- Vibration Machine
- Gas Detector
- Heater
- Others
- View All
- Material Testing
- Universal Testing Machine
- Charpy Pendulum Impact Tester
- BenchTop Hardness Tester
- Ultrasonic Thickness Gauge
- Portable Hardness Tester
- Shore Rubber & Plastic Hardness Tester
- Surface Roughness Tester
- Ultrasonic Flaw Detector
- Melt Flow Rate Meter (MFI)
- Sample Preparation Machine
- Asphalt & Bitument Testing
- Heat Stress Metter
- Plastic Testing Equipment
- Precise Measurement Solution Provider
- Rheometer
- View All
- Metrology Measuring System
- Portable Measuring & Testing Instruments
- Vibration Meter
- Push Pull Gauge
- Data Logger / Data Logging Instrument
- Digital Tachometer
- Digital Handheld Stroboscope
- Laser Range & Angle Finder
- Laser Distance Meter
- Gauss Meter
- Inspection Mirror
- Welding Gauge
- Adhesion Tester
- Cable Length Measuring Device
- Refractometer
- Rotating Analysis
- TDS
- View All
- Weighing & Metal Detection System
- Electronic & Electrical Testing Equipments
- Lab & Scientific Equipments
- Equipments for Food & Beverage Packaging
- Hot Wire Bottle Cutter
- Vacuum Leak Tester
- Pressure or Vacuum Gauge
- Secure Seal Analyzer
- CO2 Easy / CO2 Easy-DCO2 Measuring Device
- Burn Test
- Can And End Testing Equipments
- CO2 Measure
- Crown Cap Measure & Test
- Cutting Packaging
- Dimensional Measure
- Filtering
- Force Measure/Compresion/Dynamometers
- Stress Aplication
- Torque Measure
- Others
- View All
- Electric Vehicle Equipment
- Ion Fan
- Microscope
- Service Maintenance & Calibration
- Others
Redmark Industry Sdn Bhd
141-2, Jalan Radin Bagus, Bandar Baru Sri Petaling, 57000 Kuala Lumpur, Malaysia.
+603-9054 6939
+6012-499 2103
+6012-499 2103
Redmark Industry (Penang)
Sdn Bhd
7206, Mez Floor, Kompleks Perniagaan Pangsapuri Seri Cemerlang, Jalan Kampung Paya, Kampung Paya, 12200 Butterworth, Penang, Malaysia.
+6013-399 2103
sales@redmarkindustry.comchuin@redmarkindustry.com
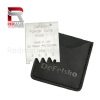
Powder Comb
| Previous | 18 / 18 | Next |
Check Powder thickness with Powder Comb before curing to help ensure correct cured film thickness the first time through the line. Avoid stripping and re-coating which can cause problems with adhesion and coating integrity.

Versatility
Quality
Sample Operation
The powder thickness is between the highest numbered tooth which made a mark and has powder clinging to it, and the next highest tooth which left no mark and has no powder clinging to it.
Example: The 75 and 150 micron teeth both make lines and have powder clinging to them but the 225 mil tooth does not. The uncured powder thickness is determined to be between 150 and 225 microns. (see above image)
Note - Most powders cure to approximately 50% of their dry thickness. Marks left by the gage may affect the characteristics of the cured film.

Versatility
- Ideal for set-up and quality control
- Works on a variety of part sizes, shapes and substrates such as metal, plastic, wood, glass, and more
- Easy to carry; convenient shirt pocketsize
- Available in microns (metric) or mils (inch)
Quality
- Broad stand-offs on both sides of teeth help keep gage perpendicular to surface when measuring
- Rugged aluminum construction for long gage life and static control
- Precision gage; manufactured to a tolerance +5 microns or +0.0002 inch
- Protective leather pouch included with each gage
Sample Operation
- Push the Powder Comb perpendicularly into the dry powder so that the two stand-offs (end tabs) on both sides of the teeth rest firmly on the substrate.
- Drag the Powder Comb along the surface of the coated part for at least 1 centimeter.
- Remove the Powder Comb from the surface and examine the marks left in the powder.
The powder thickness is between the highest numbered tooth which made a mark and has powder clinging to it, and the next highest tooth which left no mark and has no powder clinging to it.
Example: The 75 and 150 micron teeth both make lines and have powder clinging to them but the 225 mil tooth does not. The uncured powder thickness is determined to be between 150 and 225 microns. (see above image)
Note - Most powders cure to approximately 50% of their dry thickness. Marks left by the gage may affect the characteristics of the cured film.
|
Powder Comb Models |
Height Tooth 1 |
Height Tooth 2 |
Height Tooth 3 |
Height Tooth 4 |
|---|---|---|---|---|
| Model 1 (mils) | 3 | 6 | 9 | 12 |
| Model 2 (mils) | 10 | 15 | 20 | 25 |
| Model 3 (mils) | 20 | 30 | 40 | 50 |
| Model 4 (um) | 75 | 150 | 225 | 300 |
| Model 5 (um) | 250 | 375 | 500 | 625 |
| Model 6 (um) | 500 | 750 | 1000 | 1250 |


